LaTeX and Sublime Text
This tutorial explains how to use $\LaTeX$ in the text editor Sublime Text and how to set up code snippets to write faster. For a general introduction to $\LaTeX$, see e.g. this tutorial by Overleaf. This setup is inspired by this article by Gilles Castel, where a similar setup for Linux is described (using Vim as a text editor). On Windows, however, it is easier to set everything up in Sublime Text. Remark: I have only tested this on Windows, but it should also work on Linux and macOS – you just have to choose the correct PDF viewer in Step 1.
Contents:
- Step 1: Install the required software
- Step 2: Set up Sublime Text as a $\LaTeX$ editor
- Step 3: Set up snippets
- Step 4: Set up Vim navigation
Step 1: Install the required software
Install a $\LaTeX$ distribution. The most common ones are:
The most important differences between TeX Live and MiKTeX are:
- TeX Live compiles significantly faster.
- MiKTeX can install packages used in a $\LaTeX$ file on the fly. However, if you choose the “full scheme” when installing TeXLive, all common packages are already included, and additional packages can be installed using the “TeX Live Manager”. In this tutorial, we use TeX Live.
Install Sublime Text.
On Windows: Install Sumatra PDF. This is a PDF that automatically refreshes when the currently opened file is overwritten on the hard drive. (Many other PDF viewers do not even allow overwriting files that are currently opened!) If you are on Linux, you can use Zathura (
sudo apt-get install -y zathura), and on macOS, you can use Skim.app. Here you can find a list of all PDF viewers that can be used.
Step 2: Set up Sublime Text as a $\LaTeX$ editor
Install Package Control in Sublime Text: Press
Ctrl + Shift + Pand selectInstall Package Control. After the installation, restart Sublime Text.- Install the required Sublime Text packages: In the menu bar, click on
Preferences - Package Control. Then selectPackage Control: Install Package(see image below). Now you can search for available packages and install them. Install the following packages:LaTeXTools
LaTeX-cwl (this package already contains some code snippets)
Optional: Install the color scheme “10% Too Dull for My Tastes”. Afterwards, you can select the “scotchy - 10% Too Dull […]” color scheme under
Preferences - Color Scheme.... This color scheme is also used in the screenshots on this page.

Under
Preferences - Package Settings - LaTeXTools - Settings - Userchange the line"builder": "traditional",to"builder": "basic",(including the comma at the end).Close and restart Sublime Text.
- Now you can open a
.texfile in Sublime Text and pressCtrl + Bin order to compile it (this also saves the.texfile). The generated PDF file is opened in SumatraPDF automatically. If something does not work as expected, you might find a solution here.
Some further tips:
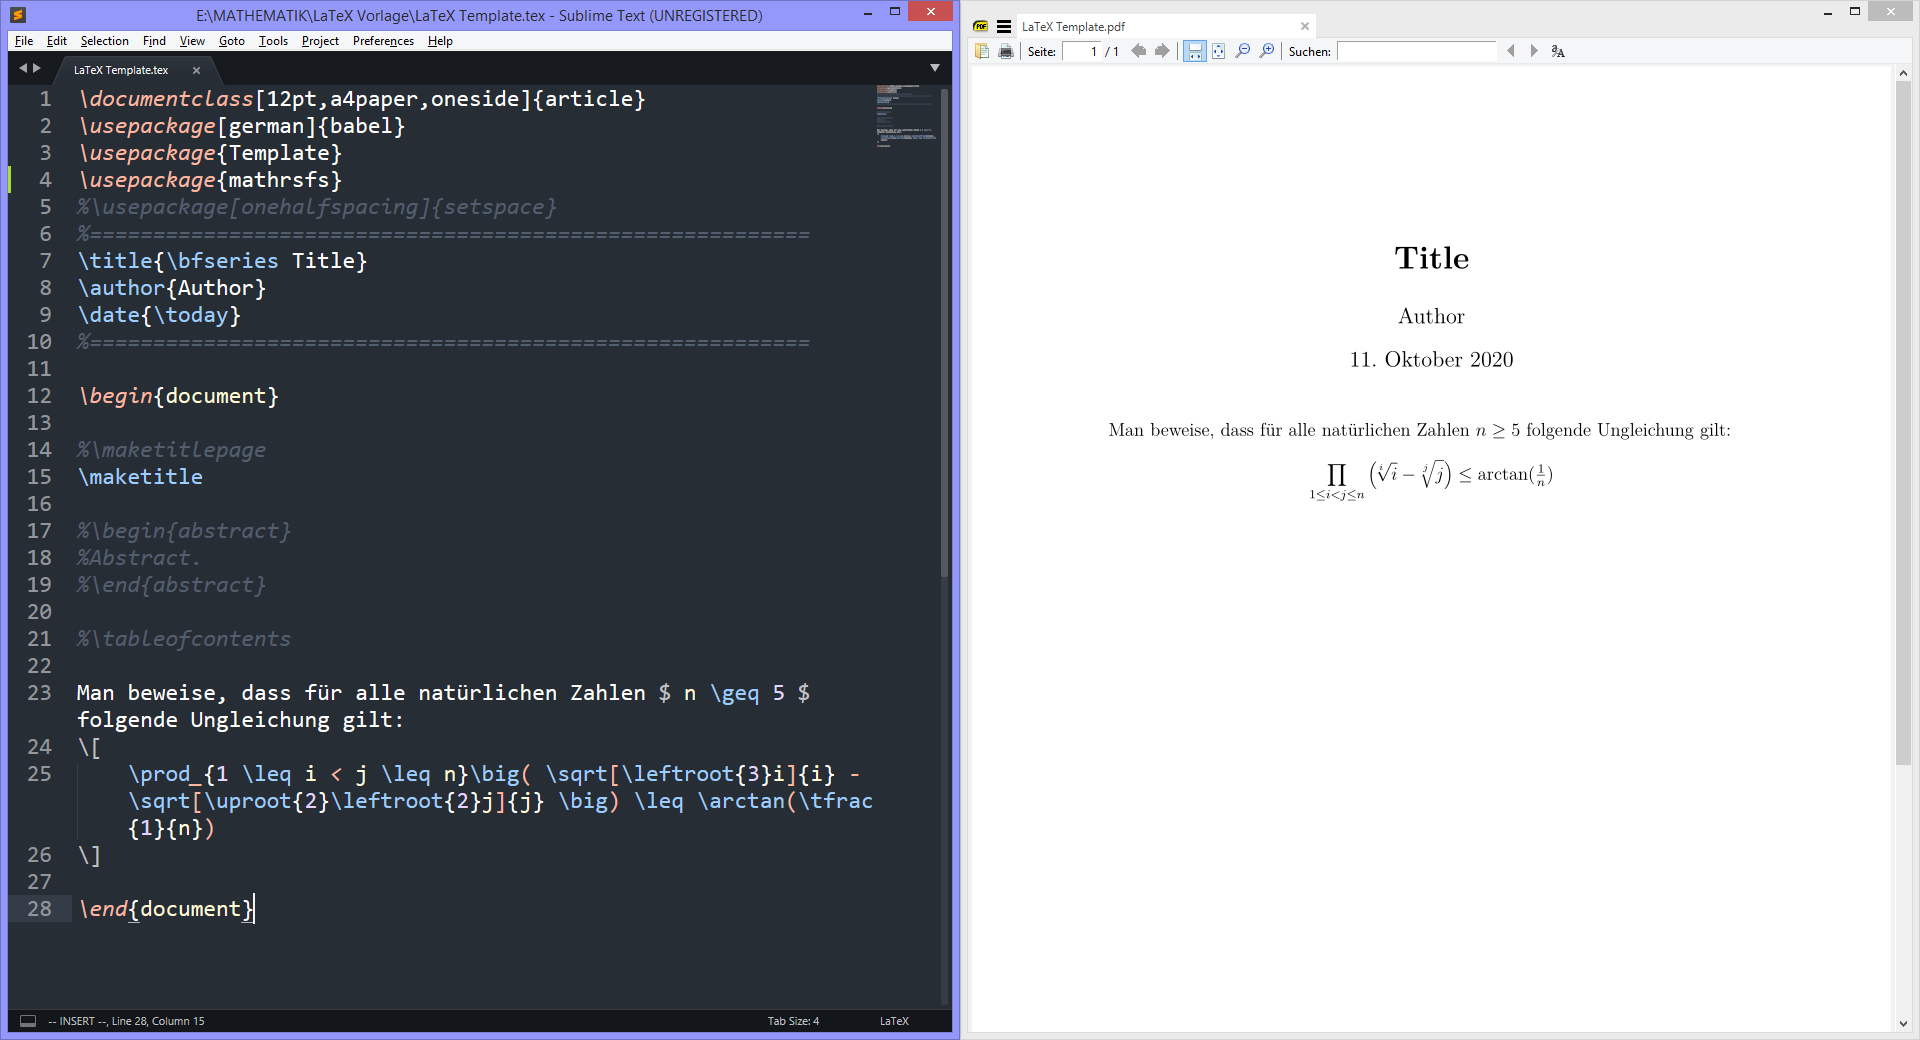
- Using
Windows key + left/right arrow, you can position the currently active window in the left/right half of your screen, so you can see the $\LaTeX$ source code and the PDF output at the same time (like in the first screenshot). By double-clicking on a line in the PDF file, Sublime text automatically jumps to the corresponding line in the.texfile (this is called inverse search).- After compiling, you can press
Ctrl + Land then immediatelyBackspacein order to clean the folder that contains the.texfile and delete all temporary files.
Step 3: Set up snippets
This functionality is the main reason why I use Sublime Text as my $\LaTeX$ editor: You can define your own code snippets, which are replaced by $\LaTeX$ commands automatically while you are typing (without even having to press an extra button!). On Linux, this can be done directly in Vim, but on Windows it is more complicated to set this up in Vim (and I could not get it to work). In Sublime Text, however, it is straightforward:
- In order to use snippets, you have to go to
Preferences - Key Bindingsin Sublime Text and paste the contents of this file into the right column. - If you do not use Vim navigation using the “Vintageous” package (see below), you can delete the first two snippets.
- Some useful commands that are not defined by default in $\LaTeX$ are also replaced automatically (e.g.
NNis replaced by\N, which stands for\mathbb{N}, and there are a few additional commands where a backslash is added:\lcm,\coker,\coim,\rotand some arcus- or area functions, i.e.\arcsec,\arsinh,\artanh, …). These commands are defined in my fileTemplate.sty, which can be copied to the folder that contains the.texfile and included by adding\usepackage{Template}to the preamble. - Using the snippet
template[tab], where[tab]stands for pressing thetabkey, a $\LaTeX$ template containing the most commonly used packages (partly by using\usepackage{Template}) can be pasted in an empty.texfile. You can also download a.texfile containing this template here. - You can find a list of all snippets here.
Here are some examples of snippets that are replaced automatically while typing:
mkis replaced by$...$(math mode).
dmis replaced by\[ ... \]with line breaks in between the square brackets (display-math mode).
<=is replaced by\leq, and>=is replaced by\geq.
sr(which stands for “squared”) is replaced by^2, andcbis replaced by^3(“cubed”).
**is replaced by\cdotandxxis replaced by\times.
//is replaced by\frac{}{}, the cursor jumps into the first curly brackets pair and you can use thetabkey to jump into the second pair and to exit the brackets.
iffis replaced by\iff,=>is replaced by\impliesand=<is replaced by\impliedby.
baris replaced by\bar{}and the cursor jumps into the curly brackets pair (you can usetabto exit the brackets),tilis replaced by\tilde{},wtilis replaced by\widetilde{}andwbaris replaced by\overline{}.
lr(is replaced by\left( \right)(and you can usetabto navigate),normis replaced by\| \|etc.
NNis replaced by\N(the set of natural numbers – this command is defined inTemplate.sty),ZZis replaced by\Z,\Q,RRis replaced by\Retc.
UUis replaced by\cup(union),Nnis replaced by\cap(intersection),wwis replaced by\wedge,vvis replaced by\vee,uuuis replaced by\bigcup,vvvis replaced by\bigveeetc.Greek letters:
.ais replaced by\alpha,.bis replaced by\beta,.eis replaced by\epsilon,..eis replaced by\varepsilon,.Gis replaced by\Gammaetc.
AAis replaced by\forall,EEis replaced by\exists.Thus, you can type for example
AA..e>0EEn_0innNNAAn>=n_0: normx_n - x[tab]<..e(where[tab]stands for pressing thetabkey), and without pressing any other keys, this is replaced by
Thus, a lot of time can be saved by remembering and using these snippets!
Step 4: Set up Vim navigation
Another system that can speed up writing in general is Vim navigation in Sublime Text. Actually, Vim is a text editor on its own, and there are keyboard shortcuts for navigation, copying and pasting text, selecting parts of a text (or a whole line), jumping to the beginning or end of a line or file etc. However, there is also a package for Sublime Text called “Vintageous”, which enables you to also use these shortcuts in Sublime Text.
Installation
Simply open Package Control in Sublime Text and install the package “Vintageous”.
A short introduction to Vim
Command mode
By default, you are in “command mode”. It is called “command mode” because you can type commands after pressing : (which will open a small command line). For example, by typing :w and pressing Enter, you can save a file. You can close a file with :q, save and close using :wq and close without saving with :q!. (But of course, in Sublime Text, you can still use Ctrl + S in order to save a file.) Furthermore, command mode you can navigate in your file using the h, j, k and l keys instead of the arrow keys. Thus, you never have to move your hand away from their “default” position on the keyboard in order to use the arrow keys or the mouse, which saves much time!
There most important commands are:
j= move cursor down by one line.k= move cursor up by one line.h= move cursor left by one position.l= move cursor right by one position.w= move cursor to the beginning of the next word.b= move cursor to the beginning of the previous word.[number n] + [one of the previous commands]= execute this commandn-times, e.g. move cursornwords to the right.0= move cursor to the beginning of the line.$= move cursor to the end of the line.gg= jump to the beginning of the file.Shift + G= jump to the end of the file.zz= center view at the current line.zt= change view so that the current line is at the top.
Insert mode
By pressing the i key, you can enter the “insert mode”, in which you can write as usual. The text that you write will be inserted before the current cursor position. You can press Esc to return to command mode. In my key bindings for Sublime Text, you will also find the commonly used combinations jk and kj to return to command mode. Since the order does not matter, you can simply press j and k at the same time to return to command mode. Apart from i, you can also press the a key to enter insert mode, but then the text that you write will be inserted after the current cursor position. Finally, you can press Shift + I or Shift + A to enter insert mode and append text at the beginning or at the end of the line, respectively, and you can press o or Shift + O to open a new line below or above the cursor, respectively, and enter insert mode.
Visual mode
If you press v in command mode, you will enter the “visual mode”. Here you can select parts of the text. The selection begins at the position, where you entered visual mode, and you can edit the end of the selection by navigating like in command mode. You can copy the selected text by pressing y, or you can cut it by pressing x. Then you will return to command mode, and by pressing p or Shift + P, you can paste the text after or before the cursor position, respectively. Finally, you can undo the last change by pressing u in command mode.
You can find a more detailed explanation of Vim here.